A few weeks ago my employer gave all newly-remote workers an unexpected payday. A moderate little bonus, no strings, to help pay for anything we wanted but ostensibly designed to make our continued work-from-home existence better.
I chose to purchase an electric sit-stand desk. I’ve been standing at my workstation since about 1998 and I even made my own standing work-station/desk when my previous employer refused the $300 expense request for a standing desk in my office.
But I digress.
I liked the frame and design of the UpLift brand and the tabletops were fine…but I wanted it to be ‘mine’. I was inspired by this design (https://www.youtube.com/watch?v=UXffPgX-s8E) but I’m no professional woodworker and I don’t have 1.21 gigawatts of skateboard decking…so I’ll have to come up with another idea.
oh and I also wanted to play with epoxy – so there is that.
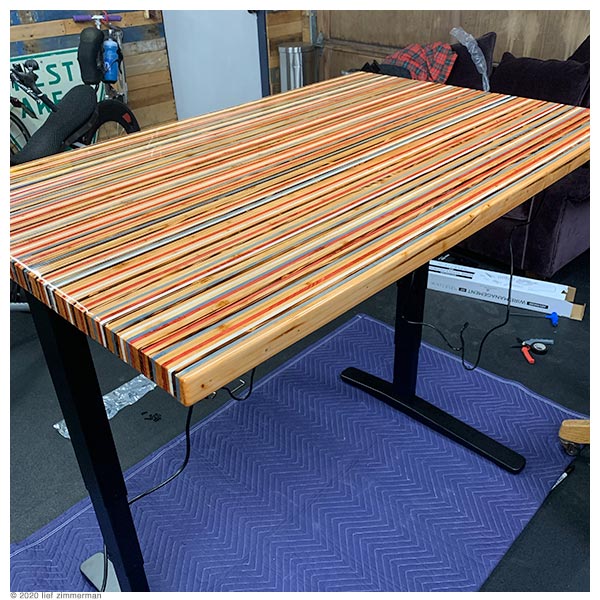
I started with the idea that I could just use lathe – I’ve used plenty of it when installing the ceilings in this house, it starts out nearly even; so I would save some milling time. I thought. I decided that I would just stain some random number of pieces in red, blue, white, and even add in some black by way of a torch. This is my Proof Of Concept I did in one-evening.
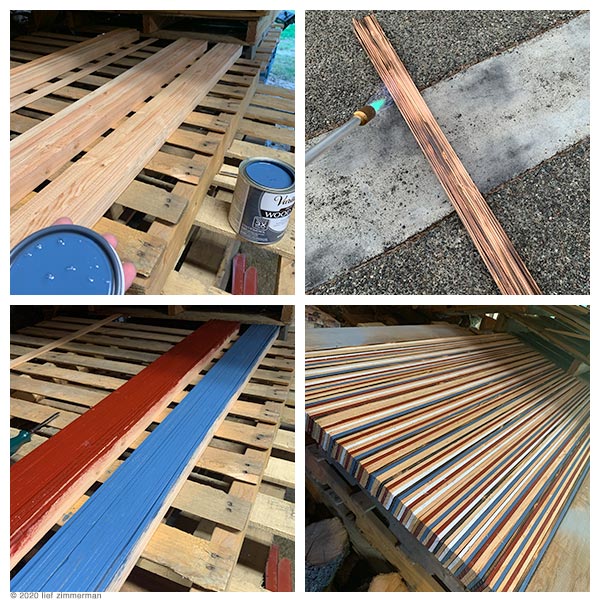
I’ve always been a sucker for stripes and, well, the decor in my office has a theme so; I figured it would coordinate without being too specific.
Me likey; time for full production. +1 for agile design.
After some conversation with BopOp and thoughts (read as lessons learned on YouTube epoxy tables) on just how even I should make it I decided to bundle them into pieces using molly-bolts and run them through a planer. In retrospect that effort was worth it – the epoxy I chose (table-top epoxy) doesn’t go on thick enough in 1-2 coats to ‘fill in’ all the gaps that I would have had if we hadn’t planed it. +1 for saving 3-4+ layers of epoxy.
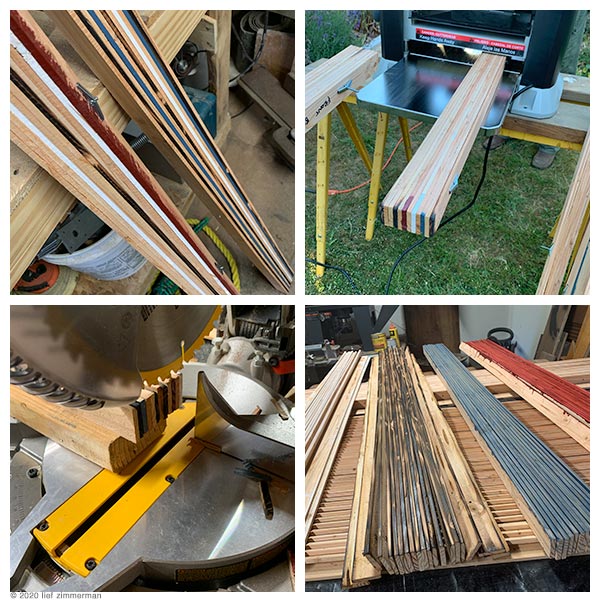
Then, after some more thinking I decided to even up the ends a bit too. +1 for evenness.
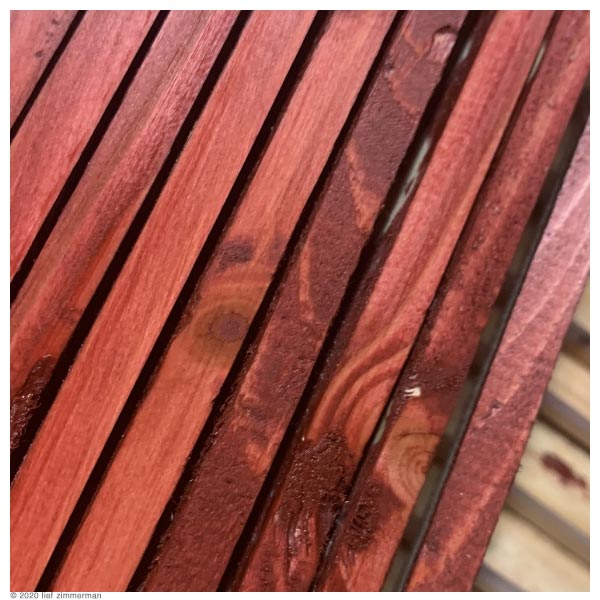
And finally I chose to rub-in the stain – NOT to paint it on. That lets some of the grain show through. I also stained some of the naked ones with a readily available maple-colored stain I found in my barn. +1 for aesthetics.
So far, if you are not keeping track, that’s +4. But I said there were some ‘lessons learned’ – here they come.
The day I started laminating I felt it was just taking too long, so after about 25 rows I just nailed the pieces without glue. Using ‘finishing’ nails. That resulted in a very weak cross-section. I did also finish with glue on the last 20+ rows but…the glue dries very stiff; nails? not so much. -1 for impatience.
And, I’m calling it a feature now but I worked from the back to the front and minor imperfections along the way led to a slight bowing of the pieces that I just couldn’t get rid of. Not a full -1 but…the nails that came out the top because I got too close to the edge were a pain. -1 for the nails and bowing as a unit because it didn’t do what I intended but, in the end, I kinda like the svelte bow I’ve got on the front edge.
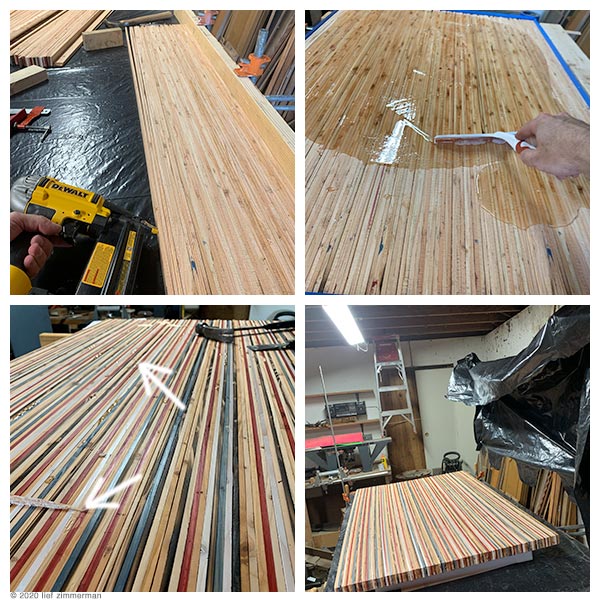
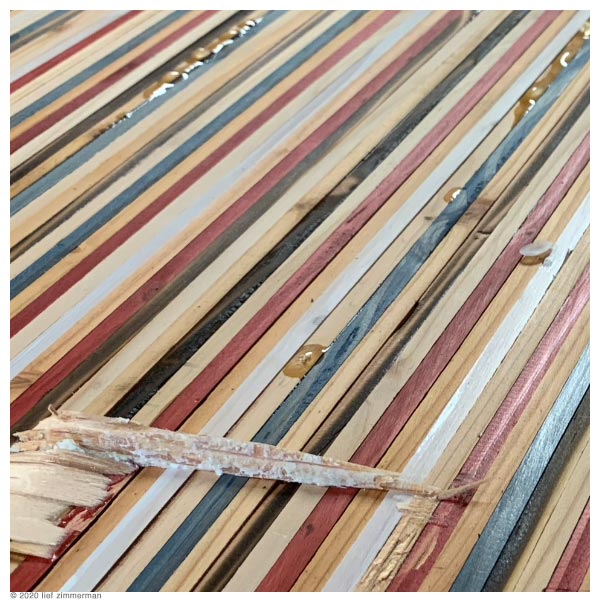
Oh – and then after testing out the epoxy on the bottom, it turns out, there are some wee little gaps in between my non-sanded edges, and non glued laminated pieces where this thin epoxy flowed into. It dried into pretty hard drip-lumps on the finish side. That cost about 3+ hours of very delicate carving with a very small chisel, followed by some gluing back in pieces that broke when I took it off the 2×4 stand, some tactical sanding, and then some tactical RE-staining of bare boards. -1 for time wasted not prepping the boards better and gluing the whole thing.
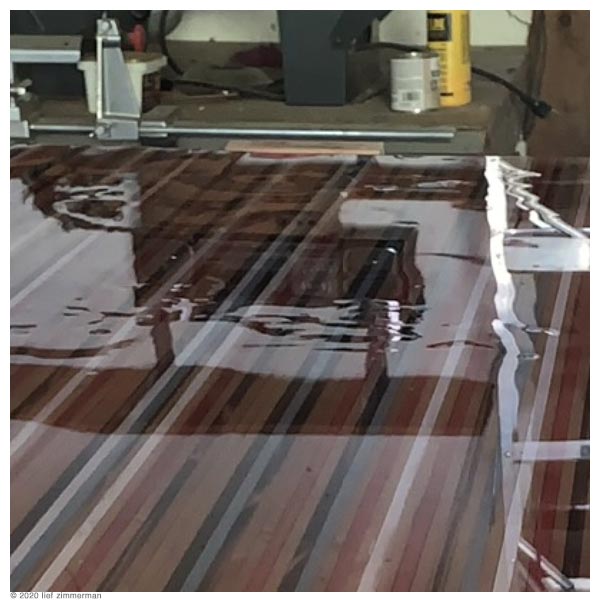
Finally, after a couple extra nights, I got the top into a good-enough place to pour the epoxy. I needed 2 quarts to minimally cover my top but I didn’t have a big enough container to hold it all so I made 1 quart, poured it, and then quickly made up the second one and poured it on right away. -1 for not getting the right 1/2 gallon mixing bucket.
It would all act like one batch right? Wrong.
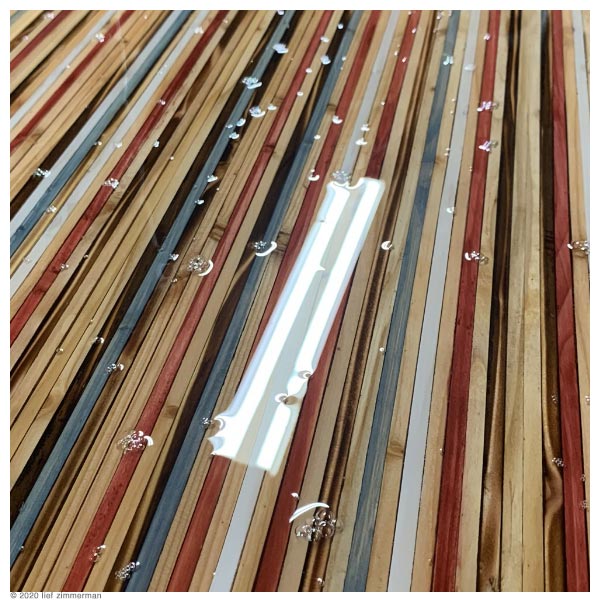
The first layer was already curing and when I poured the second layer. Add that to the unsealed boards and I got a lot bubbles that just wouldn’t stop bubbling; all night. I torched the crap out of them but not enough to stop them all. -1 for trying to be faster than the epoxy.
oh…we are at a grand total of -1 right now. (+4 & -5).
So, I sanded off the high-spots (again thank you to YouTube for a lesson on how best to do this)…and poured on another layer of epoxy.
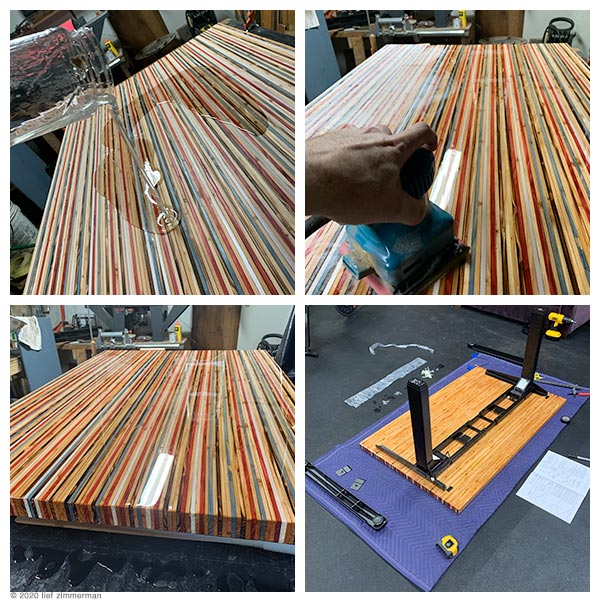
I did an okay job on this second coat. There were a few noticeable low spots, but most of them can only be seen if you are looking at just the right angle and in just the right light.
A favorite quote I use a fair amount these days came to mind,
Laugh at perfection. It’s boring and keeps you from being done.
src: the cult of done manifesto
So I plowed on; content with the overall look and ready to begin the install.
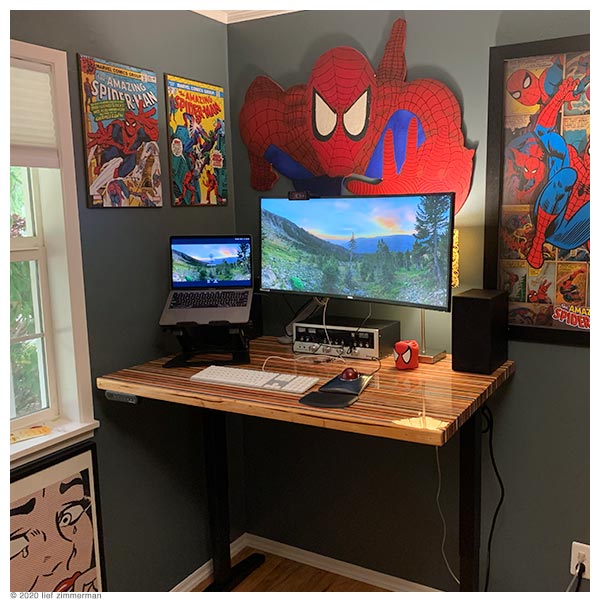
The UpLift instructions were good and with a couple extra measurements taken here and there I successfully drilled everything perfectly, mounted, and tested the electric motor. Bueno. The surface was still not 100% cured, there were some dents in it after being upside down on the blanket for a couple hours. But, I’m on day 3 now and they have all liquefied away again so, I guess I got that going for me.
Last steps, clean up our neglected office and craft-room; essentially our real life version of a junk drawer room of requirement. That took the better part of 3 days with LOTS of coordination around the house (i.e., some of the stuff that came out still hasn’t made it’s way back to it’s final landing place.)
So, several weeks later, more $$ than I expected to spend on a ‘cheap but cool’ table-top, and probably ~30 or more hours of labor, I have a work-from-home desk that I’m typing at now and I love it.
Makes me want to do more lamination and epoxy projects.
looks sideways at old dining room table…

I love the table and the room decor but you forgot to tell everyone how you made the Spidey figure above your computer screen. . .
LikeLiked by 1 person
I unearthed a roll of posters a couple days ago which contained about 4 more Spidey Posters which shall be mounted or framed in the coming days and added to the mix. I still have the cardboard one I drew in ~1988 too somewhere…it’s a little worse for wear methinks. 🙂
LikeLike