Borrowing some initiative from Rex Kreuger, a YouTuber doing ‘woodworking for humans‘, I snatched a rolling pin at a Goodwill the other day for $3. Lucky for me it was a solid-wood rolling pin so I didn’t need to do much of the ‘filling’ that Rex did in his example. The only downside to the wood is it must have been stored with some smelly candles or incense. Nothing a little shellac can’t fix.
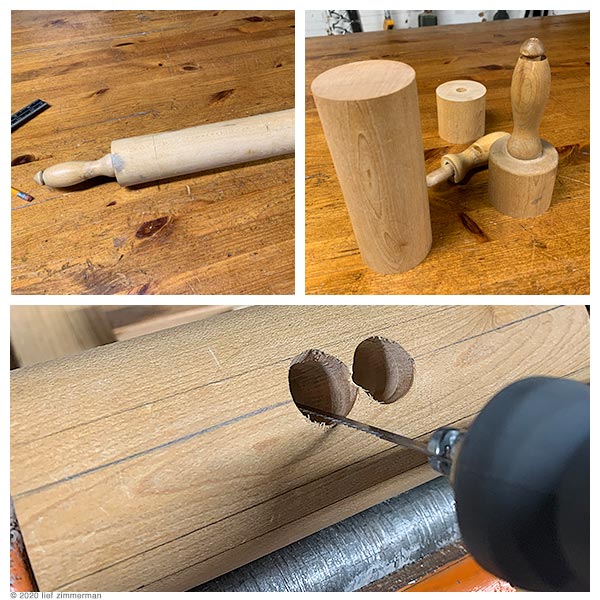
In the top right you can see the handles fitted to the ends which naturally make a ‘carvers mallet’ – all I needed was some wood glue. One of those was done as soon as I finished cutting. In the bottom image you can see the results of just how bad my drill-press skills are; this on the main project – a 12inch mallet. That misstep happened Monday night and it took me till Saturday to get over myself to keep going. #JustKeepSwimming.
The top line is how far away from the edge I actually was. The dark line going through the middle of those holes was supposed to be the edge. Total coincidence that it appears to be going through their center. The next line down was supposed to be the bottom edge, and after some…um…experiments in geometry I was able to depict the bottom-most line representing how far the OTHER way I was planning to chisel out. This image shows me getting ready to make some long cuts with the coping saw.
In summary, instead of a (] [) shaped mortise through my mallet head, I figured to fix my mistake by chiseling out a (\ /) shape mortise and wedging the @#$% out of it! Pardon my ascii.
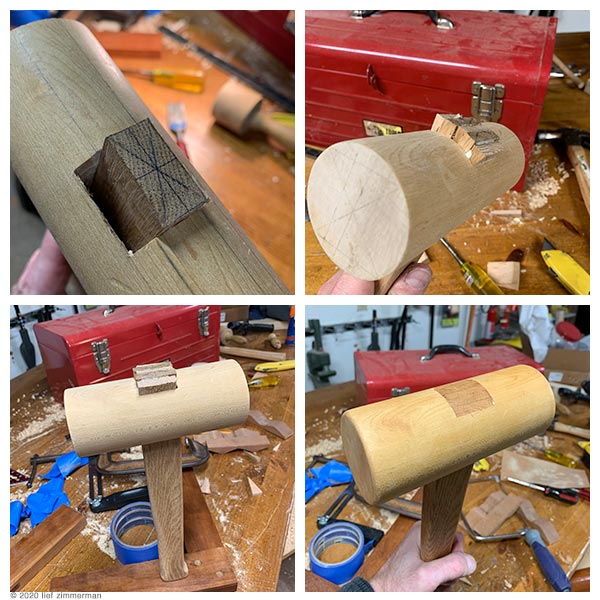
I guess I missed taking pictures of the handle making process and the chiseling process but you can see, top left, how the handle fits quite nicely straight through, it’s lined up with the lines on the top. You can also see the HUGE wedge-shaped gap on one side; hidden is the corresponding gap on the other side. Top right you can see my geometry on the mallet face and my three wedges.
By way of testing just how close to centered I got, I discovered that my mallet is balanced quite nicely. It stands on the handle base without leaning or falling over. That left me pretty thrilled. Bottom right, shows complete, with a detail of the flush-trimmed wedges and after I put on a coat of shellac.
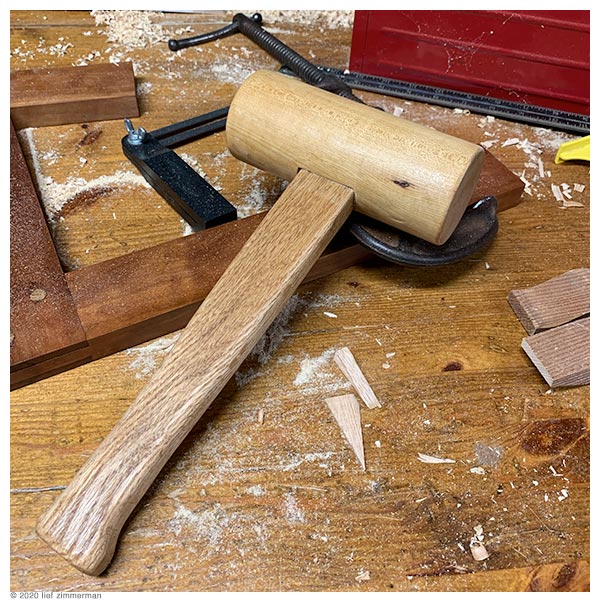
Holding the handle right where I designed the hand to land makes the mallet feel a little heavy…but I’ll use it a bit to see whether I modify something for balance.
Oh, and in this bottom pic you can see a BIT of a gap where the handle goes into the head. That was a less-than-excellent job at trying to make it so that there is a bit of a shoulder on the handle recessed into a rabbet in the head. Was planning to add some strength and stability to the joint but I’m pretty sure it ended up just a bit of a wash.
Either way, the result ought to cover my needs for many years.

Cool, I have been cleaning and waxing furniture after watching the restorer woodworker on Youtube, nice to accomplish something by hand. Love the idea of using a rolling pin!
LikeLike